
public class RedisDemo {

        public static void main(String[] args) {
            Jedis jedis = new Jedis("120.79.130.82",6379);
            //测试
            jedis.auth("Hui52818");
            String value = jedis.ping();
            System.out.println(value);
            System.out.println("+++++++++++++++++++++++++");


        }

}
在代码里面测试连接redis时需要加入密码,否则会显示没有权限
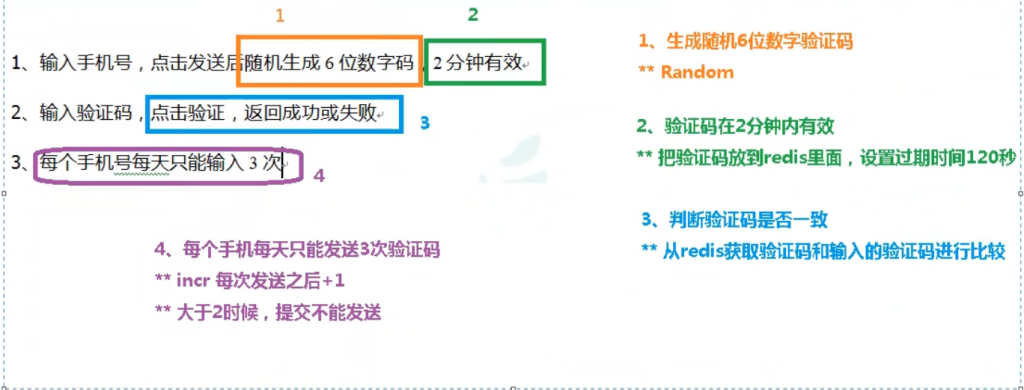
案例

package com.hui.redis;

import jdk.internal.dynalink.beans.StaticClass;
import redis.clients.jedis.Jedis;

import java.util.Random;

public class PhoneCode {
    public static void main(String[] args) {
String code = getCode();
        System.out.println(code);
        //模拟验证码发送
        verifyCode("13678765435");

        //模拟验证码校验
        //getRedisCode("13678765435","4444");
    }


    //3 验证码校验
    public static void getRedisCode(String phone,String code) {
        //从redis获取验证码
        Jedis jedis = new Jedis("192.168.44.168",6379);
        //验证码key
        String codeKey = "VerifyCode"+phone+":code";
        String redisCode = jedis.get(codeKey);
        //判断
        if(redisCode.equals(code)) {
            System.out.println("成功");
        }else {
            System.out.println("失败");
        }
        jedis.close();
    }

    //2 每个手机每天只能发送三次,验证码放到redis中,设置过期时间120
    public static void verifyCode(String phone) {
        //连接redis
        Jedis jedis = new Jedis("192.168.44.168",6379);

        //拼接key
        //手机发送次数key
        String countKey = "VerifyCode"+phone+":count";
        //验证码key
        String codeKey = "VerifyCode"+phone+":code";

        //每个手机每天只能发送三次
        String count = jedis.get(countKey);
        if(count == null) {
            //没有发送次数,第一次发送
            //设置发送次数是1
            jedis.setex(countKey,24*60*60,"1");
        } else if(Integer.parseInt(count)<=2) {
            //发送次数+1
            jedis.incr(countKey);
        } else if(Integer.parseInt(count)>2) {
            //发送三次,不能再发送
            System.out.println("今天发送次数已经超过三次");
            jedis.close();
        }

        //发送验证码放到redis里面
        String vcode = getCode();
        jedis.setex(codeKey,120,vcode);
        jedis.close();
    }

    public static String getCode(){
        Random random = new Random();
        StringBuilder stringBuilder = new StringBuilder();
        for (int i = 0 ; i < 6 ;i++){
            int i1 = random.nextInt(10);
            stringBuilder.append(i1);
        }
        return stringBuilder.toString();
    }
}
springboot整合redis
pom.xml
<!-- redis -->
<dependency>
<groupId>org.springframework.boot</groupId>
<artifactId>spring-boot-starter-data-redis</artifactId>
</dependency>

<!-- spring2.X集成redis所需common-pool2-->
<dependency>
	<groupId>org.apache.commons</groupId>
	<artifactId>commons-pool2</artifactId>
	<version>2.6.0</version>
</dependency>
application.properties配置redis配置
#Redis服务器地址
spring.redis.host=192.168.140.136
#Redis服务器连接端口
spring.redis.port=6379
#Redis数据库索引(默认为0)
spring.redis.database= 0
#连接超时时间(毫秒)
spring.redis.timeout=1800000
#连接池最大连接数(使用负值表示没有限制)
spring.redis.lettuce.pool.max-active=20
#最大阻塞等待时间(负数表示没限制)
spring.redis.lettuce.pool.max-wait=-1
#连接池中的最大空闲连接
spring.redis.lettuce.pool.max-idle=5
#连接池中的最小空闲连接
spring.redis.lettuce.pool.min-idle=0
添加redis配置类 配置类纯坑 springboot版本必须使用
<version>2.2.1.RELEASE</version>
不然配置类里面的东西全部爆红
package com.example.demo.config;

import com.fasterxml.jackson.annotation.JsonAutoDetect;
import com.fasterxml.jackson.annotation.PropertyAccessor;
import com.fasterxml.jackson.databind.ObjectMapper;
import org.springframework.cache.CacheManager;
import org.springframework.cache.annotation.CachingConfigurerSupport;
import org.springframework.cache.annotation.EnableCaching;
import org.springframework.context.annotation.Bean;
import org.springframework.context.annotation.Configuration;
import org.springframework.data.redis.cache.RedisCacheConfiguration;
import org.springframework.data.redis.cache.RedisCacheManager;
import org.springframework.data.redis.connection.RedisConnectionFactory;
import org.springframework.data.redis.core.RedisTemplate;
import org.springframework.data.redis.serializer.Jackson2JsonRedisSerializer;
import org.springframework.data.redis.serializer.RedisSerializationContext;
import org.springframework.data.redis.serializer.RedisSerializer;
import org.springframework.data.redis.serializer.StringRedisSerializer;

import java.time.Duration;

@EnableCaching
@Configuration
public class RedisConfig extends CachingConfigurerSupport {

    @Bean
    public RedisTemplate<String, Object> redisTemplate(RedisConnectionFactory factory) {
        RedisTemplate<String, Object> template = new RedisTemplate<>();
        RedisSerializer<String> redisSerializer = new StringRedisSerializer();
        Jackson2JsonRedisSerializer jackson2JsonRedisSerializer = new Jackson2JsonRedisSerializer(Object.class);
        ObjectMapper om = new ObjectMapper();
        om.setVisibility(PropertyAccessor.ALL, JsonAutoDetect.Visibility.ANY);
        om.enableDefaultTyping(ObjectMapper.DefaultTyping.NON_FINAL);
        jackson2JsonRedisSerializer.setObjectMapper(om);
        template.setConnectionFactory(factory);
//key序列化方式
        template.setKeySerializer(redisSerializer);
//value序列化
        template.setValueSerializer(jackson2JsonRedisSerializer);
//value hashmap序列化
        template.setHashValueSerializer(jackson2JsonRedisSerializer);
        return template;
    }

    @Bean
    public CacheManager cacheManager(RedisConnectionFactory factory) {
        RedisSerializer<String> redisSerializer = new StringRedisSerializer();
        Jackson2JsonRedisSerializer jackson2JsonRedisSerializer = new Jackson2JsonRedisSerializer(Object.class);
//解决查询缓存转换异常的问题
        ObjectMapper om = new ObjectMapper();
        om.setVisibility(PropertyAccessor.ALL, JsonAutoDetect.Visibility.ANY);
        om.enableDefaultTyping(ObjectMapper.DefaultTyping.NON_FINAL);
        jackson2JsonRedisSerializer.setObjectMapper(om);
// 配置序列化(解决乱码的问题),过期时间600秒
        RedisCacheConfiguration config = RedisCacheConfiguration.defaultCacheConfig()
                .entryTtl(Duration.ofSeconds(600))
                .serializeKeysWith(RedisSerializationContext.SerializationPair.fromSerializer(redisSerializer))
                .serializeValuesWith(RedisSerializationContext.SerializationPair.fromSerializer(jackson2JsonRedisSerializer))
                .disableCachingNullValues();
        RedisCacheManager cacheManager = RedisCacheManager.builder(factory)
                .cacheDefaults(config)
                .build();
        return cacheManager;
    }
}
测试一下
RedisTestController中添加测试方法
@RestController
@RequestMapping("/redisTest")
public class RedisTestController {
    @Autowired
    private RedisTemplate redisTemplate;

    @GetMapping
    public String testRedis() {
        //设置值到redis
        redisTemplate.opsForValue().set("name","lucy");
        //从redis获取值
        String name = (String)redisTemplate.opsForValue().get("name");
        return name;
    }
}
10.Redis_事务_锁机制_秒杀
10.1.Redis的事务定义
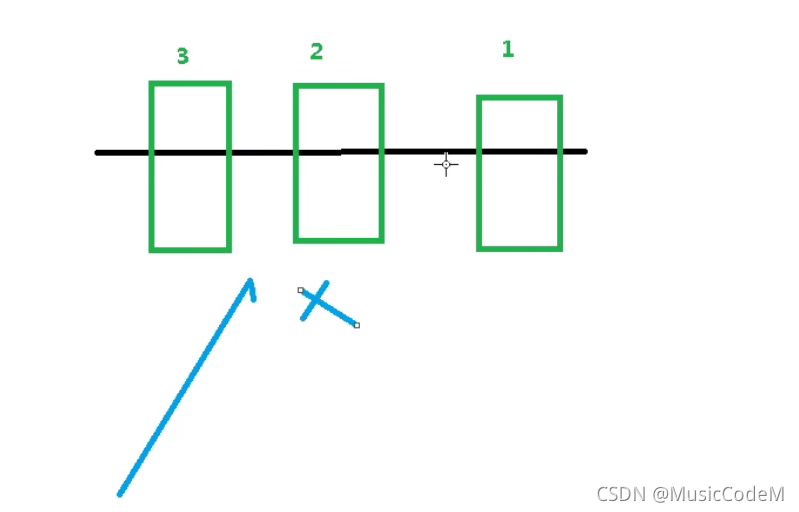
Redis事务是一个单独的隔离操作:事务中的所有命令都会序列化、按顺序地执行。事务在执行的过程中,不会被其他客户端发送来的命令请求所打断。
Redis事务的主要作用就是串联多个命令防止别的命令插队
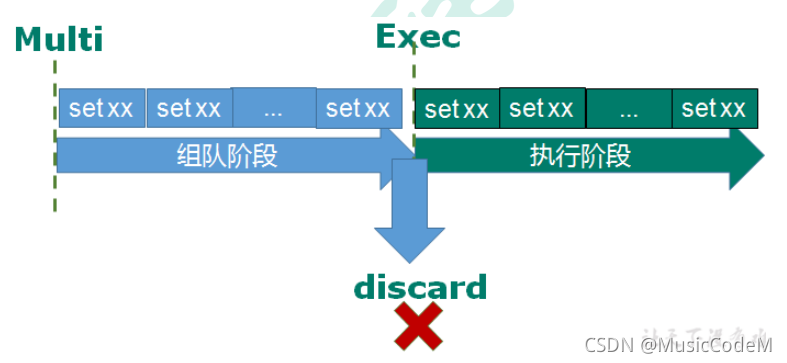
10.2.Multi、Exec、discard
从输入Multi命令开始,输入的命令都会依次进入命令队列中,但不会执行,直到输入Exec后,Redis会将之前的命令队列中的命令依次执行。
组队的过程中可以通过discard来放弃组队。
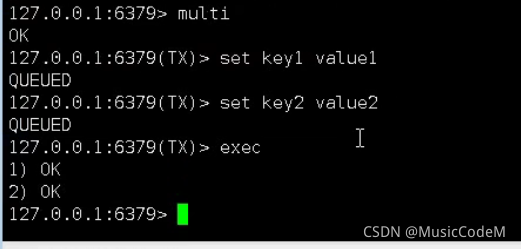
组队成功,提交成功
放弃组队

10.3.事务的错误处理
组队中某个命令出现了报告错误,执行时整个的所有队列都会被取消。
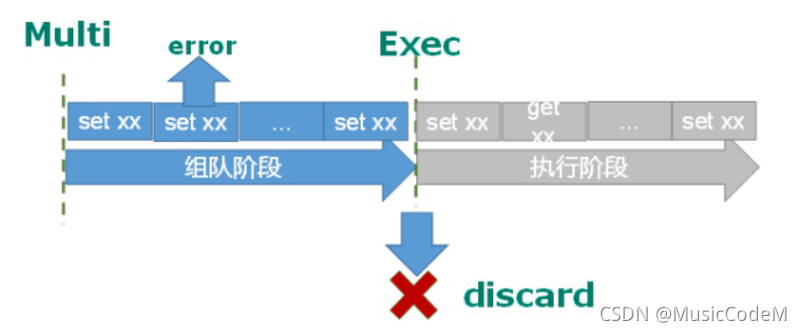
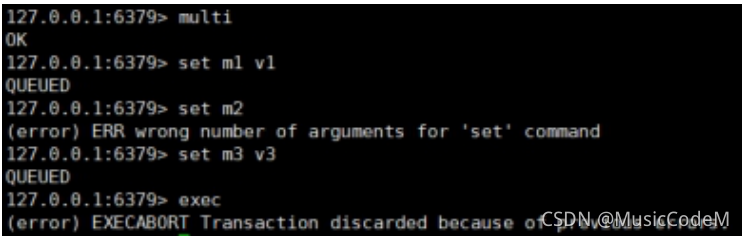
组队阶段报错,提交失败
如果执行阶段某个命令报出了错误,则只有报错的命令不会被执行,而其他的命令都会执行,不会回滚。
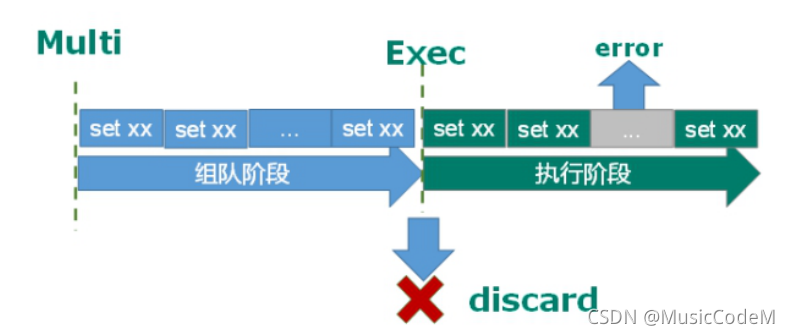

组队成功,提交有成功有失败情况